Spring Cleanup – Getting your Garden Ready for Spring

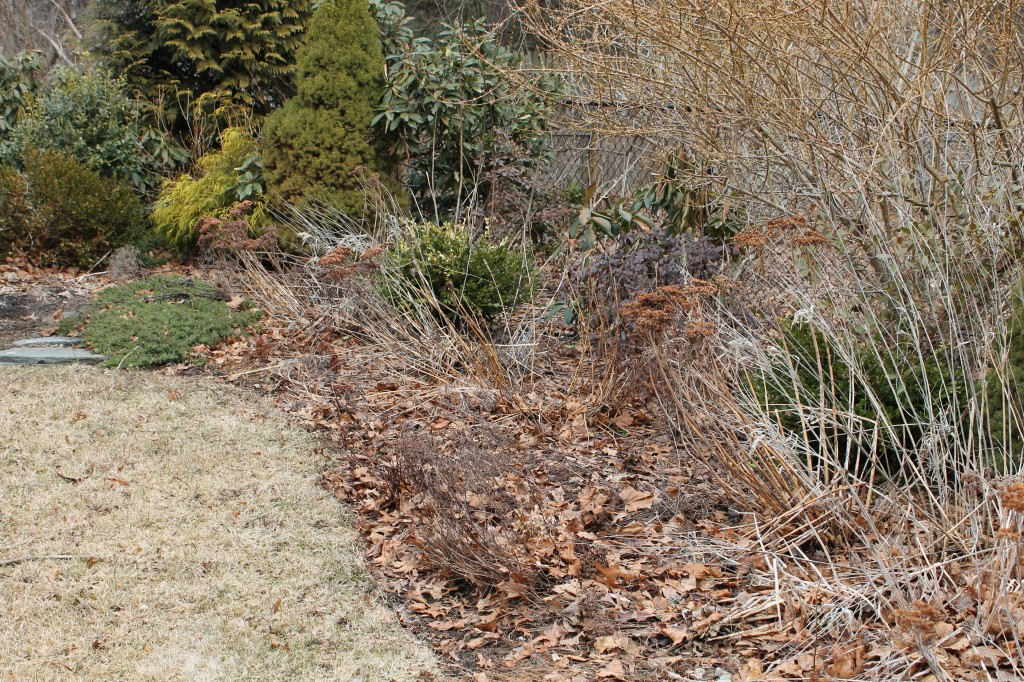
garden in March

Most gardens look their worst just before spring cleanup.

It’s that time of the year when we start poking our heads out of our houses and take a first look at our gardens.  Let’s face it, most gardens don’t look their best in March.  The winter has likely taken a toll on some of your plantings.  Maybe you had a visit from some deer?  Surely there are leaves and branches where they don’t belong and generally things look dull and brown.  But if you look close, you can see the early signs of spring coming.

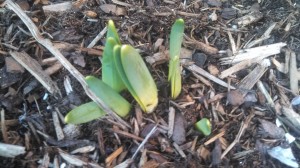
daffodil

Daffodils- a sure sign of spring

  Daffodils  and Tulips are pushing up and some other bulbs may actually be blooming (like Snowdrops).  If you’re lucky enough to have some winter blooming witch hazel, then your spring bloom has already begun (read more about winter blooming witch hazel here).

Seeing those first signs of spring is what gives us the energy for the spring cleanup, so feel free to roam around and check for new growth.  Perennials like daylilies, sedum and catmint will have new growth visible long before others.  Hostas are notorious for popping up late, so don’t be discouraged if you don’t see those new hosta spikes yet!

Everyone has their own style for spring cleanups, and you will probably develop your own once you get the hang of it.  Even if you plan on hiring professionals to do this for you, it will help you to make informed decisions if you understand the process.  We’ll start from the beginning and give you a good overview of the essential spring cleanup.  We’ll also give you some background along the way on how gardens work. So, let’s dive right in…….

First, get your hands on some good clippers and a rake.  Wire rakes work better than plastic leaf rakes, but either will do.  If you have a leaf blower, even better.   Take your tools out to the garden and have a look around.  Go ahead and remove any fallen branches from the garden and take a general assessment.  Don’t get discouraged about how bad things look.  No matter how many years you garden, things will always seem like a lost cause in March.  Take heart, by mid-April, you won’t remember what you were worried about.

Next, pick a starting point and start cutting down any perennials from last season.  If you’ve cut down your garden the previous fall, then you’ll have less to do here.  For perennials that fall completely to the ground over the winter (like daylilies, hosta, Siberian

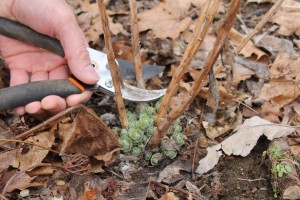
cutting down sedum

Cut an inch or two above new growth

iris) remove all traces of last year’s plant.  For perennials that leave dead vertical branches (black-eyed Susans, coneflowers, garden phlox), cut the branches down to just an inch or two above the ground.  Leaving an inch or two of the old branches acts as a reminder that something is there, so no one steps on precious garden plants or mistakes them for an empty spot.  Some perennials also put out new growth from the bottom part of old branches, so it’s best not to cut completely to the ground. 

As you cut your perennials, check for new growth near the base of your plants.  Make sure you don’t cut off any new shoots.  When in doubt, it’s better to cut less instead of more.  We are only cutting for aesthetic reasons, so it won’t hurt to leave uncut branches.

Do You Need to Cut Down Your Garden Every Year?

Cutting down old perennials is really optional.  It’s not necessary for the survival of your garden plants at all.  Gardeners typically cut down the previous year’s remains for aesthetic reasons.  The old stems will eventually decay and disappear on their own, but it is not pretty to see all that dead matter in the garden for the first half of the season.  This is why most gardeners cut down their perennials every year. 

Once you’ve cut down your perennials, the garden will look a whole lot better.  Now it’s time to start removing leaves and cuttings from the garden.  This is where it gets a little complicated.  There are lots (and lots) of opinions on this subject and many different ways of dealing with leaves in the garden.  First and foremost, if you want to keep it simple, you can just rake out and remove all the leaves and cuttings from your garden beds.

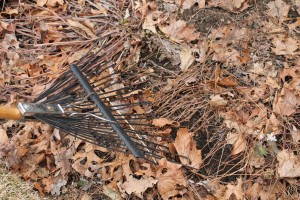
wire rake in the garden

Use a wire rake to gently remove leaves from the garden bed

  This will make them look neat and tidy and all will be well.  You will then have to mulch your garden after you’ve raked it out (we’ll talk more about mulching in another post). However, there are alternatives to simply removing all the leaves from your garden.   At some point, you should understand the options and make a conscious choice about how you are going to manage your garden.  This will affect how you do your spring cleanup each year.

To make an informed decision, there are a few things you will need to understand.  We’re going to go off on a bit of a tangent here to teach you a little about how your garden works. Don’t worry, we won’t get too scientific.  We just want you to be able to feel confident about managing your own garden.

The Landscaper Mulch and Leaf Trap

Have you ever seen those armies of landscapers that descend on the “nicely landscaped” homes of suburbia in the fall?  Heavily armed with leaf blowers, they neatly strip out every last leaf and twig from the lawn and garden beds.   When spring comes, they return again to lay mulch in the bare garden beds that they “cleaned” in the fall.  This is all well and good and these yards look very neat and manicured all year long.  This type of maintenance can be expensive and it’s what most of us think of when we think of a “well maintained” garden.  But to me, this is just another example of how we’ve lost touch with the basics of gardening.  Let’s look a little deeper and see what’s really going on here.

The Natural Cycle of Your Garden

So, we all probably understand the basics of what happens in a natural forest or meadow over the course of a year.  In the spring, plants grow, trees make new leaves and flowers bloom.  By fall, those same leaves are falling to the forest floor and wildflowers are dying back to the ground.  These leaves and dead flower stalks produce a natural mulch for themselves.  This mulch decomposes over time and adds nutrients back to the soil.  It’s really pretty amazing.  Nature is self-fertilizing and self-mulching!  So, now think about your garden.  The same thing is trying to happen.  You’ve got all this natural mulch and compost being added to your garden and most of us actually pay someone to remove it each year!  Then we pay them to come back and add manufactured mulch.  It all sounds a little crazy when you think about it.  Well, before you go and fire your landscaper, there are some benefits to cleaning up your garden each year.

Unlike the forest floor, your garden probably has a wide variety of plants, some of which do not like being smothered under layers of fallen leaves.  Also, let’s face it, fallen leaves aren’t the most attractive addition to your garden.  So, most of us, even when we understand this natural cycle, still participate (to some extent) in the cleanup and mulch trap.
Natural mulch garden

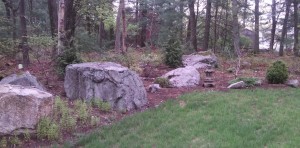
This garden was designed to use the natural fallen leaves as mulch. Each year, the fallen leaves are left and it’s not necessary to buy mulch.

It all comes down to the way your garden is designed.  It is entirely possible to design a garden that looks great and functions well even with a covering of fallen leaves on the ground.  A garden like this would have shrubs and tough perennials that can easily push up through a layer of leaves.  This is a subject for another day, but, keep it in mind if you ever get tired of the yearly cycle and just want a garden that is more natural and requires less maintenance.  The mulch and leaf trap can be avoided with some planning.

Okay, so, now you know a little about how a garden works.  Leaves and other decomposing materials can actually give gardens nutrients and act as a natural mulch.  But, fallen leaves can also smother some perennials and can make a garden look messy and unattractive.

Some Alternatives to the Mulch and Leaf Trap

Some experienced gardeners that are trying to stay closer to the natural cycle will strategically use fallen leaves to mulch and add compost to the garden. There are several ways to do this.  The first, (as we mentioned earlier) is to design the garden, so it can stand up to a layer of leaves each year and still look good.  (We’ll cover the details of this in another post).  Another method is to clean out the garden completely, save the leaves and compost them. You can then use the composted leaves from previous years to mulch the garden.  Some gardeners rake out the garden and mulch up the leaves and cuttings by running them over with a lawn mower.  They then put the newly made mulch back into the garden being careful not to smother smaller perennials.  If you have a typical garden that has smaller perennials in the front and larger perennials and shrubs in the back, you can just remove the leaves from the front part and put them in between the shrubs in the back of the garden.  This will reduce the amount of mulch you will have to buy and the leaves will go unseen in the back of the garden.

One last word on removal of leaves and cuttings in the garden.  Any plants that have been damaged by disease should have all their cuttings removed from the garden.  Leaving cuttings from diseased plants in the garden can cause diseases to spread. 

Now that you understand the benefits and dangers of leaves and cuttings in the garden, you can make your own decision about how you want to manage your annual cleanup.  Most beginners start by doing the typical cleanup process. Remove everything and then buy mulch.  This is fine.  As you gain experience over the years and feel more confident, you can go ahead and try some of the more natural (and inexpensive) alternatives.

Now let’s get back to our cleanup process….

Removing Leaves and Cuttings from the Garden

If you are not using leaves to mulch your garden, you will need to remove them along with any of the remaining cuttings from your perennials. Use your wire rake to gently pull out the leaves from between plants.  Be careful, some perennials can be pulled up if you are too rough with the rake.  A leaf blower may be helpful ,but you will probably still need to get at some areas with a wire rake even if you have a leaf blower.  Some areas will require you to use your hands to remove leaves.  Don’t worry about removing every single leaf from the garden.  A few leaves (as we have learned) may actually be good for your garden.  Just pay attention to the look of the garden.  Any leaves that will stay hidden, or can be mulched over can stay behind.  Just make sure no perennials are buried under layers of leaves. Also, make sure to remove leaves that get caught in the branching of shrubs.  These can really look unsightly in the garden.

Once you have cleaned out your garden, you will have to mulch it.  Mulch provides many benefits to your garden including weed prevention, moisture retention and improving the look of your garden. Our next post will give all the information you need to choose and lay mulch in your garden.  Before you leave this topic, let’s do a quick rundown of the important steps of garden cleanup:

1)       Get a wire rake and a good pair of clippers (and a leaf blower if you have one)

2)    Remove any fallen branches or other debris from your garden.

3)      Cut down all dead stalks of perennials leaving an inch or two to mark the spot where  possible.  Be careful to cut above any new growth.

4)       Decide on your garden clean up method.  Will you be using your fallen leaves as a natural mulch or will you be removing them?

5)       Remove all leaves from around perennials so they can grow freely.

6)       Remove as many leaves as possible from the garden if you will be using another material for mulch. If you’ve decided to use your leaves for mulching, make sure (again!) leaves are cleared away from perennials.

7)       Don’t worry about getting every single leaf.  Just make sure the garden looks good and check yet again that there are no leaves smothering perennials.

8)      Remove fallen leaves from the branches of shrubs.

9)       You are ready to mulch!

Posted in Do It Yourself, Gardening, Gardening General | Tagged , , , , | Leave a comment

Spring Design Projects – Make Some Real Progress This Year

Okay, spring is right around the corner and it’s time when we all start thinking of the great things we’re going to do with our yards this year. 

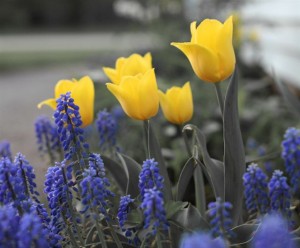
tulips, grape hyancinth, Jonanthan Glover

Spring is coming! Photo by Jonathan Glover
This is a great time to think about the how’s and why’s of design before you start storming the local Home Depot and clear them out of pansies and Easter hydrangeas that will never survive the next winter.  Let’s take a step back and learn a little about the design process so you can be ready to make some real progress this spring!  First, take a deep breath, there’s still snow on the ground in most places and there’s plenty of time before the spring rush. So, grab a cup of coffee and settle in, we’ve got a lot say on this topic….

Good Design Starts with You

First and foremost, the design process starts with you and your family.  You are the ones living in your house.  This may sound obvious, but it’s something you should think about.  We’ve all spent hours dreaming over Pinterest pics all winter (Yes, we’ve got a Pinterest account too.), but none of those pics on your “Dream Garden” board are of your house.  None of them were created for you and your family.  Even though it may be tempting, the last thing you should ever do is cut and paste someone else’s “Dream Garden” into your own back yard.  Design sources like Pinterest and Houzz are great places to find ideas and tips to get you closer to your design goals, but don’t let them become your design goal!

Leslie Best 1

Design around the needs of you and your family and your space will look great naturally.

This spring, start out on the path to really improving your living space and landscape by designing for you!  This is true for both indoor and outdoor spaces.  The first step is to put away all the images and photoshopped dreams you’ve accumulated over the winter and think about how you live in your space. Really think about it.  What doesn’t work?  What’s missing from your space that has you looking for design ideas?  Do you want to entertain more?  Do you need a quiet space for yourself?  Do you need a better place for the kids to play in?  Do you need a spot for your teenager’s entourage to hang out in? Maybe a better set up for grilling?   Maybe you just need a little more green in your life?  These are all the beginnings of design goals.  The design process should never start by looking at a picture of someone else’s house and saying “I want my house to look like that!”  Start by creating goals based on the way you live.  Your primary goal should always be to improve the way your living space works. Spaces that work well have a sense of harmony that makes them desirable to everyone.

Set Your Design Goals

Once you’ve figured out what’s working and not working in your living space, then you can go ahead and set some design goals.  Design goals should be straightforward and they should address problems with your existing living space.  So, first identify the problem, then create a goal to solve it.  This is where most of us fall apart.  We don’t think we have the design talent to solve problems with our living spaces.  This is a big mistake we make.  Most of the design process is basic problem solving.  Sure, you may need to call on some local talent to help you here and there, but you can make real progress if you just follow some basic guidelines.

Don’t worry if you can’t solve all of your living space problems on your own!  It’s easy to get overwhelmed.  Start with a general goal that addresses why your space isn’t working for you.  Next, you can work down to specific goals like “Make outdoor grilling easier”, or “Create outdoor space for summer entertaining”.   If you’re afraid you don’t have a good “eye” for design, don’t worry.  Once you have a goal or a whole list of them, pick a starting point and go for it!  You’ll find that making the space “look good” won’t come until the final steps of the design process.  Remember that your goals can also address emotional needs, not just physical problems with your space.  Feeling better about your surroundings is part of making your space work.

Start Designing

      Once you have your goal set, start problem solving. Don’t start thinking about how your new space will look yet, just start by thinking about how to get to your design goal logistically. Where will things go? How will traffic flow?  Here are some tips to solving your living space problems:

          1)  Avoid creating spaces that require a great deal of discipline to use or maintain. Your designs should accommodate the way your family lives.  If your design requires your family to change its habits, it’s doomed to fail.

       2)  Let your design encourage new behavior on its own.  You’ll find you can change habits and traffic flows naturally by creating spaces that force or encourage behaviors.  Better yet, if you can design around existing behaviors, even better!  Never try to change behavior or traffic patterns just to accommodate a new design.  Instead, use design to change behaviors that you think need to be changed.

         3) Think practically!  Don’t create spaces that fulfill a romantic vision.  Create spaces that you will really use. Picture yourself using your new space.  When will you use it?  How often?  Who else will use it and how?  Avoid creating spaces that are far from your normal traffic pattern.

         4)  Once you have your basic design ideas, then (and only then!) start to think about how they will look.  This is when you pull up all those Pinterest images and start to apply styles to your basic design concept.  Instead of cutting and pasting, you should now be applying styles from designs you like onto your own design.  Look for styles that fit the mood you’re going for.

         5)  Avoid what’s “in” and “trendy”.  Well-designed living spaces should be timeless.  If you switched out your formica countertops for Corian in the 90’s, then upgraded to granite in the 00’s and are now thinking about pouring concrete in your kitchen, then we’re talking to you!  Our rule is that what’s “in” today will be “out” tomorrow.  Look for styles that fit the design and mood you want, but are not representative of the latest fads.

You’re ready to go!

Once you have your design concept and style picked out, the rest is easy.  If you really feel you need help to bring it all together, this is a good time to ask for it. Even better, if you think you can do it yourself, go for it!  The important thing is that you’ve thought through your design process and you have a clear idea of how you want to improve your living space.  There is a natural beauty to well-designed spaces because they work! “Decorating” is just the icing on the cake of a well-designed space.  Spend your time developing solid goals and basic design concepts that make your life easier and better, then you can have fun decorating and planting the spaces after.  No amount of “decorating” can ever fix a poorly-designed space.

Check out our Landscape Elements section for tips on creating specific features of your landscape and our Think Like a Garden Designer for more info on learning to design.

Happy Designing!

Posted in Design, Do It Yourself, Garden, Gardening, Home, Outdoor Living | Tagged , , , , | 2 Comments

The Best Hydrangeas – A Multi-Part Series for homeowners… Part 6 –Climbing Hydrangeas (Hydrangea anomala petiolaris) and How to Grow Them

Climbing hydrangea

Climbing Hydrangeas are rarely associated with their shrubby cousins.These hefty vines occupy a space in the garden all their own.These vigorous climbers can reach a height (or length) of over 40 feet and produce large white flower heads that have a similar structure to lace cap hydrangea flowers.  Garden designers use climbing Hydrangeas to add drama and vertical interest to shady spots in the landscape.

Just give this plant a sturdy structure to grow on and lots of space and you won’t be disappointed!

Getting the Best out of Your Climbing Hydrangea

If you want to add some vertical (or even horizontal) interest to your landscape, there is almost no climbing vine more dramatic than the climbing Hydrangea.It is not widely planted, so it definitely turns heads.Its large features give it a structural and architectural feel that you wouldn’t get out of a wisteria or clematis vine.The trick to using climbing Hydrangeas is finding the right spot.They like shady areas and need consistent moisture when getting established.

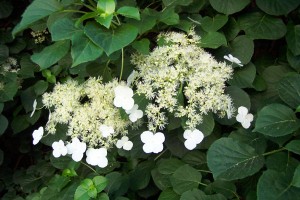
Flower heads of climbing Hydrangea

These giant climbers will grow fast once established, but it may take a year or two for them to get comfortable with their spot.So, don’t be discouraged if your climbing Hydrangea doesn’t grow much the first year.You will also need to be patient for flowering.

Some vines take up to 5 years to flower, so it’s best to consider this plant an investment for the future.The good news is that they are attractive even without flowers.Please don’t let all this talk of patience and time discourage you.Climbing Hydrangeas are well worth the time investment.

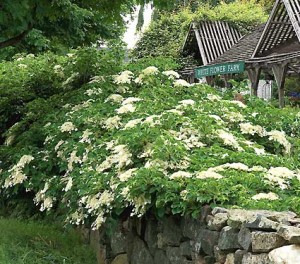
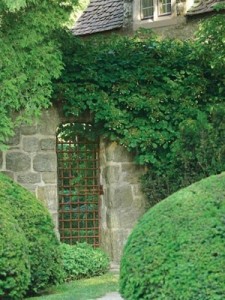
Climbing Hydrangeas can also creep along stone walls

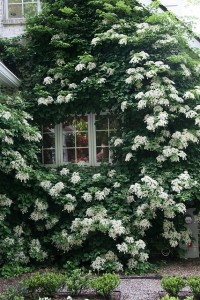
Climbing Hydrangeas can be grown vertically on a structure or wall, or can creep horizontally along the ground or a stone wall.If you are going to let your climbing Hydrangea climb, be sure to give it a solid structure to climb on.This can become a very heavy plant with age!We do not suggest letting a climbing Hydrangea climb the side of a house unless it has a brick or stone surface.Even then, never let the Hydrangea climb onto a shingled roof!If you are using a pergola or arbor, make sure it’s a sturdy one.Climbing Hydrangeas are sometimes planted at the base of tall trees and allowed to climb up.

Climbing hydrangeas provide vertical interest even with no blooms


There is virtually no maintenance required for climbing Hydrangeas.Just trim as necessary if you want to keep the vine to a certain size, otherwise just let it grow!

The bottom line with climbing Hydrangeas is that patience pays off.Find an appropriate spot, plant it and give it some extra water the first season, then forget it for a year or two.Your patience will be rewarded with a stunning show for years to come.

Posted in Gardening, Shrubs | Leave a comment

The Best Hydrangeas – A Multi-Part Series for Homeowners… Part 5 – Oakleaf Hydrangeas (Hydrangea quercifolia) and How to Grow Them

Oakleaf Hydrangeas are yet another under-utilized Hydrangea in backyard landscapes.

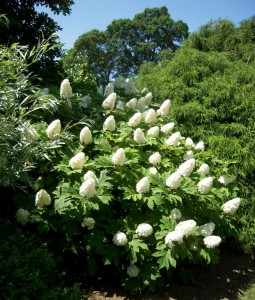
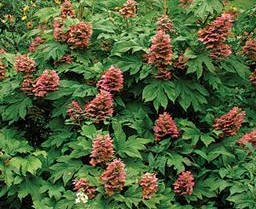
A mature Oakleaf Hydrangea in summer

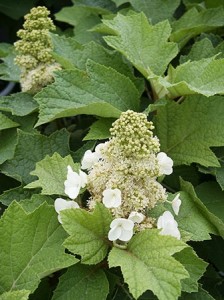
Like the smooth Hydrangea ‘Annabelle’, Oakleaf Hydrangeas usually look pretty dismal in a nursery container. This is unfortunate, because most homeowners pass them by and miss out on a truly beautiful plant.Oakleafs are most comfortable in the woodland border where they can blend in with natural surroundings.They are a large, rustic looking plant that produces magnificent white cone-shaped flower heads over Oak leaf shaped foliage. The white flower heads turn crimson as the season progresses. Think of them as the Bigleaf Hydrangea’s big burly cousin.Unlike other Hydrangeas, they have interesting fall foliage color and even an exfoliating bark that gives them winter interest.

Care and Maintenance of Oakleaf Hydrangeas

Oakleaf Hydrangeas can take a wide range of conditions but ideal is morning sun with afternoon shade.

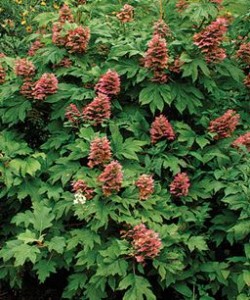
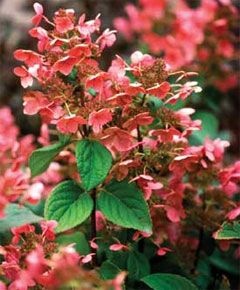
The blooms of Oakleaf Hydrangeas fade to deep pink in the late season

The woodland border usually works well.The only thing that you really should avoid is planting your Oakleaf Hydrangea in boggy soil.It cannot tolerate “wet feet” for too long.The large size and features of the Oakleaf Hydrangea make it seem out of place in well-manicured gardens.It looks more at home as part of the natural woodland or as part of a casual relaxed garden.

Oakleaf Hydrangeas usually do not need pruning or trimming.They are best left to grow on their own.Give them plenty of space so you won’t be tempted to trim them.They are typically hardy to Zone 5 but may experience some winter bud burn in far northern gardens.This will inhibit flowering.If you are in a region in Zone 5, you may want to protect your Oakleaf from winter wind.

The best Varieties of Oakleaf Hydrangea

You will not find a wide range of varieties of Oakleaf Hydrangea in the nursery, but here

oakleaf Hydrangea quercifolia 'Snowflake'

The superior flower heasds of Hydrangea quercifolia ‘Snowflake’

are a few cultivars you may run into.

‘Snowflake’ (Hydrangea quercifolia ‘Snowflake’) – This is our favorite.It has the most impressive flowers of the all the Oakleafs and blooms much longer than others.It’s about 5-8 feet tall and wide at maturity.

‘Alice’ (Hydrangea quercifolia ‘Alice’) and ‘Snow Queen’ – These two are interchangeable and not quite as impressive as ‘Snowflake’.The blooms do not last as long, but they are both very common in nurseries. Both are still impressive plants, so don’t be too disappointed if you can’t find ‘Snowflake’and need to go with one of these.

Hydrangea quercifolia ‘Snow Queen’

For the smaller garden, there are a few compact varieties, namely ‘Pee Wee’ and ‘Sikes Dwarf’.Both claim to stay 4 feet tall and wide and have similar flowers to ‘Alice’ and ‘Snow Queen’.

So, if you have a garden that borders the woods, or you just want a natural feel in your landscape, try one of these rustic beauties and enjoy the year-long interest.

Posted in Gardening, Shrubs | Tagged , , | Leave a comment

The Best Hydrangeas – A Multi-Part Series for homeowners… Part 4 – Smooth Hydrangeas (Hydrangea aborescens) and How to Grow Them

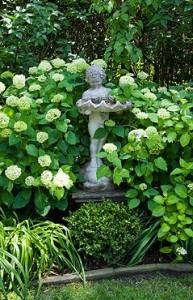
Hydrangea aborescens is at home in a romantic garden

Smooth Hydrangeas are one of the great underused plants of today’s gardens.  Garden designers use this plant whenever they get the chance, but homeowners have somehow missed out on this gem.

At first glance, the smooth Hydrangea looks very similar to a classic mop head Bigleaf Hydrangea (Hydrangea macrophylla) with white flowers.The good news about this Hydrangea is that it has almost none of the problems that haunt to classic Bigleaf Hydrangeas.

The Basics of Hydrangea aborescens

Smooth hydrangeas are very easy to grow.They produce lots of large white flower heads, sometimes as large as cantelopes.They prefer partial shade, but can live in dense shade. The flower show may be a little reduced, but they still look great in a shade garden.Like the reblooming Bigleaf Hydrangeas,smooth Hydrangeas bloom on new branches every season, so you can trim smooth Hydrangeas dramatically each spring to promote new growth.  New blooms will open throughout the season and you can even trim off old blooms to promote new ones.

The best use of this Hydrangea is in shade gardens, romantic gardens and woodland borders. The white flowers glow in the shade.Smooth Hydrangeas can live in full sun, but the flowers typically burn during hot spells.

Introducing ‘Annabelle’

There are not many cultivars of smooth Hydrangea to choose from in the nursery.Until recently ‘Annabelle’ (Hydrangea aborescens ‘Annabelle’) was the only choice available at most garden centers.

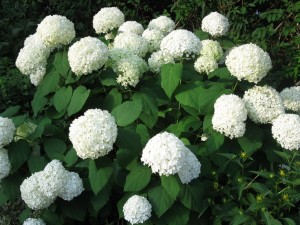
Hydrangea aborescens ‘Annabelle’

‘Annabelle’ is a long-time favorite of garden designers and a backbone of shade gardens.This is the classic smooth Hydrangea. The flowers of ‘Annabelle’ are large, white balls that can get significantly larger the flowers of their mop head cousins.However, ‘Annabelle’ has one weakness.Her flower heads are so large and showy that they sometimes cause the plant to flop over when it rains.Designers love this plant so much that they have used several methods to try and deal with this problem.Some will cut back ‘Annabelle’ almost to the ground in early spring and place a support structure over the trimmed plant.The plant then grows up through the supports and is held up all season.Others have tried to plant ‘Annabelle’ behind supporting hedges of boxwood.Some designers just let ‘Annabelle’ flop and appreciate the natural unkempt look.

In recent years, the industry has tried to improve on ‘Annabelle’ and have introduced as few notable new cultivars of smooth Hydrangea.

Hydrangea aborescens ‘Incrediball’ has larger flower heads and stands up better than ‘Annabelle’

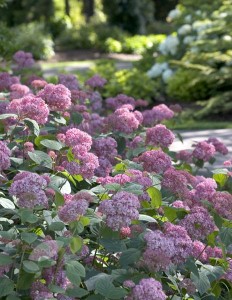
‘Incrediball’ claims to have solved the flopping issue, but the jury is still out on the new introduction.We’ve tried it for a year and so far, it has flowered beautifully and has stood up better than ‘Annabelle’, but I don’t expect it to be flop-proof.Either way, it does seem like an improvement over ‘Annabelle’.Another new comer is “Invincibelle Spirit”.This smooth Hydrangea istouted as a pink version of ‘Annabelle’, but it really hasn’t lived up to expectations.The flower heads are significantly smaller than ‘Annabelle’ and the pink color is a bit drab.Don’t be fooled by pretty pictures on the internet or on labels.I would not suggest buying ‘Invincibelle Spirit” without seeing it in bloom first.

Hydrangea aborescens ‘Invincibelle Spirit’

One other tip before heading out to buy your first ‘Annabelle’; smooth Hydrangeas do not look good in the nursery.  This may be why they have never caught on with homeowners.When you see ‘Annabelle’ or ‘Incrediball’ in a nursery container, they will likely look beat up, lanky, and generally unappealing.Don’t let this stop you!The shabby looking plant you see in the nursery will grow into a robust shrub covered with flowers in a few short years.Smooth hydrangeas do require a little patience but it’s worth the wait!

Posted in Gardening, Shrubs | Tagged , , , , | Leave a comment

The Best Hydrangeas – A Multi-Part Series for homeowners… Part 3 – Pee Gee Hydrangeas (Hydrangea paniculata) and How to Grow Them

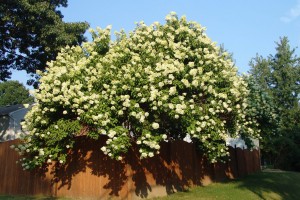
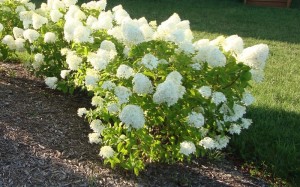
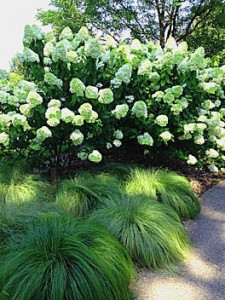
PeeGee Hydrangeas add care-free flower power to almost any garden

Hydrangea paniculata is one of the easiest ways to get a large, long lasting, dramatic show of flowers in your garden.These Hydrangeas are very different from their Bigleaf Hydrangea cousins.These are large, fast growing woody shrubs that produce large white blooms that last all summer.They have none of the problems that Bigleaf Hydrangeas have.They are very hardy and bloom on first year branches. Most varieties are hardy to Zone 3!They also love sun and do not wilt every time the hot sun shines on them.The best thing about these Hydrangeas is that the flower very reliably and profusely.It is rare to see a PeeGee Hydrangea that doesn’t bloom well.

The Basics of PeeGee Hydrangeas (Hydrangea paniculata)

One of the first widely planted varieties of Hydrangea paniculata was Hydrangea paniculata ‘Grandiflora’.

The old favorite, Hydrangea paniculata ‘Grandiflora’

This quickly became known as Hydrangea “P. G.”Since then, numerous other cultivars have been introduced, but the nickname has carried through to the entire group.These days, most nurseries will reluctantly refer to all cultivars of Hydrangea paniculata as “PeeGee’s”.

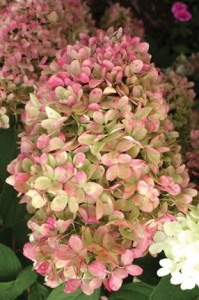
One of the few drawbacks to PeeGee Hydrangeas is the lack of color choice.Flowers are almost universally white.The flower heads do have some other interesting characteristics.The flowers of most cultivars turn from white to a rose pink color toward the end of the season.This is where a lot of the cultivars differ.Some offer earlier transition to pink, others promise more pink than others.

Care and Maintenance of PeeGee Hydrangeas (Hydrangea paniculata)

Unlike other Hydrangeas, PeeGee Hydrangeas love sun.They can take hot sun and even take partial shade.

Most blooms of Hydrangea paniculata turn pink in the late season

They will not bloom well in full shade, but they will live and bloom sporadically.Picking the perfect spot is not necessary for PeeGee’s.  They are versatile and reliable in many situations.

Care of PeeGee Hydrangeas in minimal and only consists of proper pruning and trimming.Most PeeGee varieties grow fast and should be trimmed back hard every year to keep them in check.Some newer varieties are compact and do not need extensive trimming.For most PeeGee’s, one good haircut each early spring works well.Most varieties will get lanky and sprawling if not trimmed yearly.A nice thing about PeeGee’s is that you don’t need to follow any rules on trimming them.They respond well to even the roughest haircut.So, trim them each spring to the size you want and expect a few feet of new growth each season for most varieties.

The Best Varieties of PeeGee Hydrangeas (Hydrangea paniculata)

As we discussed earlier, PeeGee Hydrangea flowers are generally white with some transition to pink as the season progresses.Most of the cultivars are offering improvements on this color transition, while some may be focusing on plant size.One of the few complaints about PeegGees is their large size and informal habit they develop if not trimmed regularly.New cultivars are available that claim to be more compact.Time will tell if this holds to be true in the garden.

Here is our rundown of the popular varieties and which we think are the best.

Grandiflora (Hydrangea paniculata ‘ Grandiflora’) – This is the classic forefather

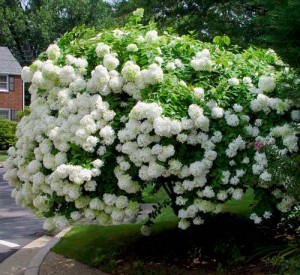
Hydrangea paniculata ‘Grandiflora’ in tree form

of the PeeGees.It is a reliable bloomer, but compared to some of the newer cultivars, the flowers are not as showy.The flower heads are white balls about baseball to softball size that fade to pink in the fall.It can reach a height of over 10 feet after many years and take on the habit of a small tree. In fact, you may find it in the nursery pruned into tree form.This is a great garden plant, but it has been outdone by newer introductions.

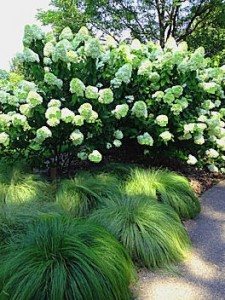
Limelight (Hydrangea paniculata ‘Limelight’) – This one of our favorites!And it’s very easy to find.Limelight gives you the most stunning flowers of all the PeeGees.

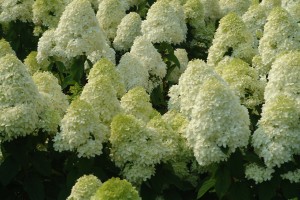
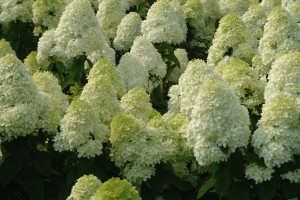
The dramatic blooms of Hydrangea paniculata ‘Limelight’

These large flower heads begin to bloom with a faint green hue, thus giving this cultivar its name.The flowers then mature to pure white and in the fall, develop a pink hue.Frequent watering and lots of sun will get you the biggest, showiest flowers.The only downside to ‘Limelight’ is its size.It can get big and lanky if not trimmed yearly.So, give ‘Limelight’ a sunny spot and some room, and give it a hard trim each spring before the leaves emerge. A well established plant can easily put on 3-4 feet of new growth (with flowers!) after trimming.

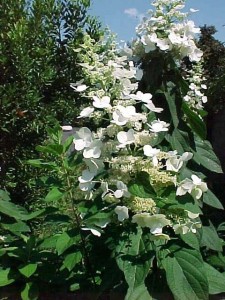
A flower head of Hydrangea paniculata 'Tardiva'

A flower head of Hydrangea paniculata ‘Tardiva’

Tardiva (Hydrangea paniculata ‘Tardiva’).Tardiva is a lovely Hydrangea that has a similar growth habit to ‘Limelight’ that requires hard pruning each spring, but its flowers form a long open cone that is quite different than ‘Limelight’ or ‘Grandiflora’.This type of flower is the most common in the PeeGees. It gives the plant a less formal look, but the flowers are very interesting, especially at close range. As with all PeeGees, the white flower heads turn pink in late season.Other cultivars like ‘Kyushu’ and ‘Unique’ are almost identical to ‘Tardiva’.Unfortunately, while these are lovely plants, like ‘Grandiflora’, they have been outdone by newer varieties.Read on to see what improved varieties have to offer.

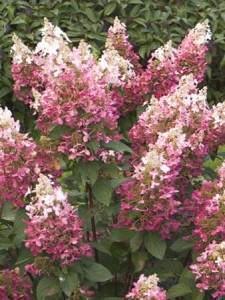
Hydrangea paniculata ‘Pinky Winky’

Pinky Winky (Hydrangea paniculata ‘Pinky Winky’) – Also readily available, Pinky Winky is a significant improvement on the similar ‘Tardiva’, ‘Unique’ and ‘Kyushu’.The plant is more upright, so flower heads tend to point upward and have a deep pink hue in late season.Overall, the entire plant keeps an elegant look all season.It does not grow quite as fast as ‘Limelight’ but still give it a good trim each spring.  ‘Pinky Winky’ is a real crowd pleaser.

Quick Fire (Hydrangea paniculata ‘Quick Fire’) – Also readily available.Quick Fire is very similar to ‘Pinky Winky’ but claims to bloom up to one month before othe PeeGee varieties.This may be a bit of an exaggeration, but it does bloom earlier.

Hydrangea paniculata ‘Quick Fire’

Our experience shows that the flower heads of ‘Pinky Winky’ tend to be larger and a little more showy, but overall the plants are very similar.If bloom time is more important to you, then go with ‘Quick Fire’, otherwise, ‘Pinky Winky’ won’t disappoint.

Some new introductions to mention are “Little Lime’ and “Little Quick Fire’.Both promise to be more compact varieties of their big brothers.Since these varieties are so new, we can’t say from experience if the claims are true, but it might be worth giving them a try.In case it didn’t show in our descriptions above,‘Limelight’ and ‘Pinky Winky’ are our favorites of the Hydrangea paniculata group.One other noteworthy mention is ‘Little Lamb’.This plant looks absolutely dismal in a pot at the nursery, which is why most nurseries won’t sell it.If you are lucky enough to find it, take a chance on it!

Hydrangea paniculata ‘Little Lime’

This Hydrangea will form a large rounded shrub about 5ft tall and wide and it will be covered with very dense snowballs of white fading to pink.It will take 3 or 4 years to mature, but it’s worth the wait.What makes this Hydrangea so special is its flower heads made up of tiny florets.While the flower heads are large, they have smaller features than ‘Limelight’ or ‘Grandiflora’ giving this plant a special refined look.

Overall, the PeeGee Hydrangeas are a reliable and easy to grow group of Hydrangeas.Even though we have our favorites, there is hardly a dud among all of the varieties on the market.So, go out and get one and start appreciating the flower show this year!

Posted in Gardening, Shrubs | Tagged , , , | Leave a comment

The Best Hydrangeas – A Multi-Part Series for homeowners… Part 2 – Bigleaf Hydrangeas (Hydrangea macrophylla) an How to Grow Them

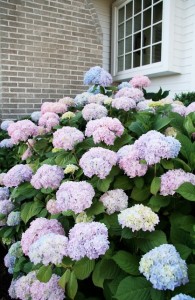
Bigleaf Hydrangeas are the classic Hydrangeas that we all know and (maybe) love.These long blooming shrubs are staples of the American garden.The classic blue Hydrangea (Hydrangea macrophylla ‘Nikko Blue’) is probably the most recognized and most frequently used hydrangea in backyards across the country.

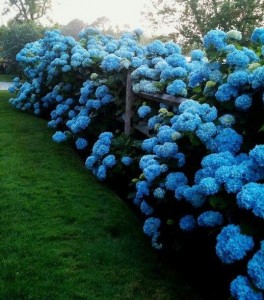
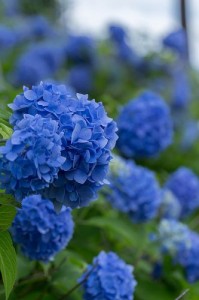
The classic blue flowers of Hydrangea macrophylla ‘Nikko Blue

A mature and healthy ‘Nikko Blue’ Hydrangea can be a truly stunning plant, but contrary to popular belief, it is not an easy or low-maintenance shrub.The old standard Hydrangeas like ‘Nikko Blue’ are very finicky plants.They don’t like it too hot in the summer or too cold in the winter.They only produce flower heads on one year old stems, and they are not reliable flowerers.Hydrangea macrophylla also changes its flower color depending on the pH of the soil it’s planted in.So, that azure blue everyone is after may not come naturally to your hydrangea once it gets established in your garden soil.So how did this difficult shrub become so popular?Well, Hydrangea macrophylla can perform very well if it’s in a spot well suited to its needs.These spots are hard to find in your average back yard.Bigleaf Hydrangeas like sun in the summer, but not intense heat.They also cannot take very cold winters with open exposure.So, where does that leave?Coastal communities that stay temperate in the winter and cool in the summer are great spots for Bigleaf Hydrangeas.Also, sheltered spots near the foundation of the home where the Hydrangea can stay a little warmer in winter, but still get some sun in the summer.If they get too much hot summer sun, the leaves will wilt dramatically and flower heads will burn.If all this sounds like too much work for a shrub, then read on and we’ll show you how you can great Hydrangea blooms without all the fuss.

What You Need to Know to Grow Bigleaf Hydrangeas (Hydrangea macrophylla)

To make this easy, we’re going to break up the Bigleaf Hydrangeas into three different groups. These are the classic mop heads, the classic lacecaps and the rebloomers.

The Classic Mop Head Hydrangea

This group of Hydrangea macrophylla is the most common garden hydrangea that produces big round flower heads all summer. Flower heads can be blue, white, pink or any shade in between.

Bigleaf Hydrangea is the only Hydrangea that can offer classic blue flower heads

The most used of these is Hydrangea macrophylla ‘Nikko Blue’.This cultivar is widely considered the standard for the blue Hydrangeas.We’ve already talked a lot about this type of Hydrangea, but let’s reiterate some its important qualities.First and foremost, this is a very finicky plant.But, if you are dead set on getting those classic blue flower heads, then you will have to learn to grow the classic mop head Bigleaf Hydrangea (most likely the ‘Nikko Blue’ variety).If you are flexible with your flower color and want an easier, more reliable plant ,then you will be much better off with one of the reblooming varieties (see below) or maybe even looking at the Smooth Hydrangeas or PeeGee Hydrangeas (click to visit our articles on those plants).

So, for those of you willing to work a bit for that classic mop head look, here’s what you need to know.First, if you are in a coastal or high altitude region with cool summers and temperate winters, you are in a perfect location to grow classic mop heads.You can plant them almost anywhere in these regions.However, if you are in a Zone 6 or Zone 5 region with hot summers and cold winters, you will need to place your mop head Hydrangea in a spot sheltered from the winter wind and direct afternoon summer sun.

Bigleaf Hydrangea can get bud burn in cold winters

You will also have to avoid too much shade if you want flowers.Finding the perfect spot for your mop head hydrangea is key to your success.In Zone 5 regions, even in a good spot, you will have more success if you wrap your hydrangea in the winter.The cold winter winds can “burn” the flower buds, leaving you with no flowers the following summer. When you buy your Hydrangea, it will be labeled with a hardiness Zone (most are hardy to Zone 5 or 6).Keep in mind that this is the hardiness of the plant, not the flower buds!This means that the plant may live in very cold temperatures, but the flower buds may be killed off in most years.This is why it’s best to protect your Hydrangea from cold winter winds and temperatures.If you are experiencing consistent winter bud kill, you should probably consider moving to a different type of Hydrangea (like a reblooming Hydrangea – see below).

In hot spells during the summer, give your mop head plenty of water.They require more water than most garden shrubs.In the spring, once the leaves have started to emerge, you can clip off any branches that are dead.

The bloom color of bigleaf Hydrangea changes based on the pH of the soil

If leaves are already emerging on healthy branches, then any branch without new leaf growth is likely dead and can be removed.If you are not sure, scratch the surface of the branch.If it is green underneath the outer surface, then it is alive, if not, then it is likely dead and can be removed.This type of Hydrangea produces lots of dead branches, so expect to remove some each year.Be careful about trimming healthy branches.Classic mop heads will only produce flowers on one year old branches.This means that if you trim a branch, it will not produce a flower for another year.This can become a problem if your Hydrangea gets too large.If you trim the entire plant, you will go one full year without any flowers.If you need to reduce the size of a classic mop head hydrangea, we suggest selectively trimming about half the branches one year and the other half the next year.This way you will have some flowers each year.Of course, if you are willing to sacrifice a year without flowers, go ahead and trim the entire shrub at once.This will not hurt your Hydrangea.You can trim it generously without causing problems.

All Bigleaf Hydrangeas change the color of their flower heads based on the pH of the soil they are planted in.More acidic soils produce more blue flower heads.More alkaline soil will produce more pink flower heads.This is true regardless of the cultivar you purchase.Even the famous ‘Nikko Blue’ cultivar will turn pink in alkaline soil.Keep this in mind when you are shopping for Hydrangeas.Remember the color of the bloom in the nursery may change when the Hydrangea get acclimated to your soil.If you want to influence the color of your hydrangea blooms, you can add supplements to the soil that will help you get more blue or pink flowers.Most nurseries will sell soil supplements to make your soil more acidic (blue flowers) or alkaline (pink flowers).Just ask.

The Classic Lace Cap Hydrangea

The delicate blooms of a Lace Cap Hydrange

The lace cap Hydrangeas are an interesting twist on the classic mop head Hydrangeas.

Instead of large, rounded flower heads, lace caps have flat flower heads that are more subtle, but also much more interesting than mop heads.Care and maintenance of the lace cap is identical to the classic mop heads, only the flower shape is different.If you are looking for the long blooming charm of the Hydrangea, but want something different than your neighbors, try a lace cap Hydrangea.

Reblooming Bigleaf Hydrangeas

In 2004, the world of Hydrangeas changed.The “Endless Summer®” reblooming Hydrangea was introduced. As you know, Bigleaf Hydrangeas (Hydrangea macrophylla) only bloom on one year old branches.But in 2004, the Endless Summer Hydrangea became the first widely marketed Hydrangea macrophylla that could bloom on new branches and continue creating new flower buds all season long.This really changed the game for homeowners that had trouble growing or maintaining their Bigleaf Hydrangeas.

The popular reblooming Hydrangea ‘Endless Summer’

The introduction of the reblooming Hydrangea changed things in many ways.First, these reblooming Hydrangeas can be trimmed every spring and still produce flowers, so no more worrying about losing blooms on trimmed branches.Second, no more problems with cold winters killing next summers’ flower buds.If buds are killed off over the winter, new ones will form in the spring!Since the original “Endless Summer” reblooming Hydrangea was introduced, it has been extended into a series and competitors have offered other series as well.In addition to the Endless Summer® series, there is now the Forever & Ever® series and the Let’s Dance® series among others.Some of these series even include come lace cap rebloomers.

So, why would anyone plant the classic mop heads when they can plant a reblooming Hydrangea?Most gardeners have, indeed stopped planting the old classics and have switched over to reblooming varieties.But, there is one drawback to the rebloomers and that’s color.Most of the rebloomers, including the most popular, “Endless Summer” tend to have a lower intensity of color than the classics.

Hydrangea ‘Endless Summer’ blooms all summer but the color of the blooms are not usually as intense as the classic mop head Hydrangeas

The blues are paler and also vary more.Since the classics (like ‘Nikko Blue’) produced only one flush of flowers all at the same time, all the flowers have the same exact color.Rebloomers produce flowers throughout the season and therefore each flower will have a slightly different color.This gives the plant a more dramatic but less elegant effect.The end result is usually a paler color and also a “multicolored” effect of blooms.For some, this is just not acceptable.For others, it’s a welcome addition.You’ll have to decide for yourself which you like more.As with all Bigleaf Hydrangeas, you can attempt to get a deeper blue color on your reblooming Hydrangea by adding aluminum sulfate to the soil.

The rebloomers also tend to stop blooming in hot dry conditions.So, the rebloomers are tending to bemore popular in northern gardens where winter bud kill is a problem and less popular in the south.

Posted in Gardening, Shrubs | Tagged , , , , , , | Leave a comment

The Best Hydrangeas – A Multi-Part Series for homeowners… Part 1 – Understanding the Basics of Hydrangeas

The classic blue flowers of Hydrangea macrophylla ‘Nikko blue’

Hydrangeas are certainly one of the best loved garden plants of the American garden.Most homeowners that know nothing about plants can still identify the classic blue flowers of our most common hydrangea.

As a garden designer, I get requests for “Hydrangeas” constantly.Whenever I do, I feel the need to sit my customers down and give them a long lesson on the subject.The truth is, the classic blue hydrangea is only one of numerous species and cultivars of Hydrangea available, and it’s usually not the best choice for most gardens (especially northern gardens).In this multi-part series, we’ll introduce you to the easiest and most beautiful Hydrangeas and help you to choose which is best for your home garden.

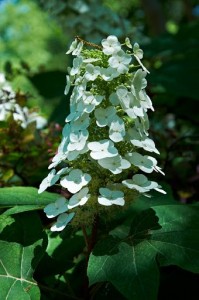
The bloom of an Oakleaf Hydrangea – Hydrangea quercifolia

In this first part of the series, we’ll introduce you to the different types of Hydrangeas and how they function in the garden.Then, we’ll dedicate a following part to each of these and give you the tips you need to grow them successfully.If you’re going to plant Hydrangeas, it’s worth the time to get to know what’s available. There are some truly great plants out there that most homeowners are missing out on.Learn what garden designers have known for years.There is much more to Hydrangeas than the blue mop heads of your grandmother’s garden!

Getting to Know Hydrangeas

Let’s start by getting to know the botanical genus Hydrangea.There are over 70 species of Hydrangea, but you don’t need to learn about all of them.And don’t worry, you won’t need to memorize their Latin names either!To get the best out of the Hydrangea genus for your garden, there are five different species you should know about.If you’d like to jump ahead and learn more about any individual species, just jump to the menu at the end of this post.

Hydrangea macrophylla

The bloom color of bigleaf Hydrangea changes based on the pH of the soil

Otherwise, read on and we’ll explain a little more about how to choose the right Hydrangea species for your garden. Here are the five:

Bigleaf Hydrangeas (Hydrangea macrophylla) – This is the most commonly recognized Hydrangea in American gardens.It has large green leaves and blooms with large flower heads in summer in various colors (most famously blue).  Flower heads can be large and round (typically called mop heads) or flat and circular (typically called lace caps).  The bloom color of Bigleaf Hydrangeas can change based on the pH of the soil.

The blooms of Hydrangea paniculata ‘Limelight’

PeeGee Hydrangeas (Hydrangea paniculata) – These Hydrangeas have woody stems and can be large shrubs that even resemble small trees.They can get much larger than the Bigleaf Hydrangeas and typically produce larger, white, cone-shaped flowers.  Flower heads fade to pink in the fall.

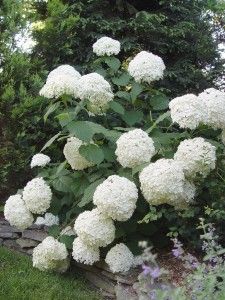
Hydrangea aborescens 'Annabelle'

Hydrangea aborescens ‘Annabelle’

Smooth Hydrangeas (Hydrangea aborescens) – Smooth Hydrangeas look very similar to big leaf Hydrangeas, but typically have only white mop head flowers.  ‘Annabelle’ is the most common cultivar. The smooth Hydrangeas are favorites of shade gardens.

An Oakleaf Hydrangea in late summer

Oakleaf Hydrangeas (Hydrangea quercifolia) – Oakleaf Hydrangeas are also woody shrubs that can get larger than the Bigleaf Hydrangeas.The leaves resemble oak leaves and the bark of the shrub is exfoliating.The flower heads are white, long and cone shaped.  Oakleaf Hydrangeas are most used in woodland gardens because of their natural, unmanicured look.

hydrangea anomala petiolaris, climbing hydrangea

Climbing Hydrangeas can also creep along stone walls

Climbing Hydrangeas (Hydrangea anomala petiolaris) – As the name implies, Climbing Hydrangeas are large climbing vines that produce large, wide, white flower heads.

As you can see, there are a wide variety of different plants called “Hydrangeas”.Some are small, soft stemmed plants, while others are large climbing vines or small trees.Let’s talk about the benefits of each Hydrangea species, so you can get an idea of what you want in your garden.

Using the Right Hydrangea

So, now that you’re aware that there are different types of Hydrangeas, let’s talk a bit about what each group has to offer.If you are really looking for that classic blue Hydrangea flower head, then you will need to stick with a Bigleaf Hydrangea.

Bigleaf Hydrangea is the only Hydrangea that can offer classic blue flower heads

This group of Hydrangeas gives you that classic look in several different colors including blue, butthe flower color tends to change depending on the pH of the soil it’s planted in.So, don’t go by the color of the flower in the container at the nursery.The flower color will likely change once it’s been planted in your garden. Bigleaf Hydrangeas are also a fussy plant.They like sun, but can’t take too much heat, so in southern climates, it’s best to grow them in afternoon shade.If you do grow them in full sun, they will need lots of water in the summer. It’s common to see Bigleaf Hydrangeas wiltingduring heat waves here in Massachusetts.Bigleaf Hydrangeas are also sensitive to the winter cold and usually suffer from bud burn in cold windy winters in zones.We’ll give you more detail in our post on Bigleaf Hydrangeas (just click here).

If you are looking for lots of flowers, but don’t need the colors of the Bigleaf Hydrangea flowers, then the white flowering PeeGee or Smooth Hydrangeas may be for you.PeeGee

Hydrangea paniculata can get quite large

Hydrangeas offer the most blooms of all the garden Hydrangeas.They are large plants that bloom profusely and they are not fussy at all.They do not have any of the problems of the Bigleaf hydrangeas.However, they can get quite large, so they may not be suitable for any site.They also prefer lots of sun to bloom well.The smooth hydrangeas, on the other hand are also much less fussy than Bigleafs but prefer shady spots.They also stay the same size as the Bigleafs, so they are almost interchangeable in the garden.For more detail on the PeeGee Hydrangeas click here. You can learn more about Smooth Hydrangeas here.

If you like Hydrangeas, but want something a little different, then the Oakleaf Hydrangea may be for you.Oakleaf Hydrangeas are very under-utilized in the garden, so you may be the first in your neighborhood to have one.The Oakleaf Hydrangea is a very rustic plant that looks and feels at home on the edge of the woodland.It’s not as manicured looking as the other Hydrangeas, but it provides interest all year long.It produces very large, long, cone

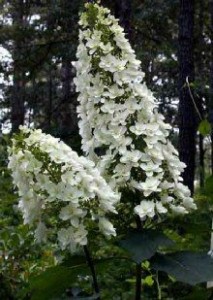
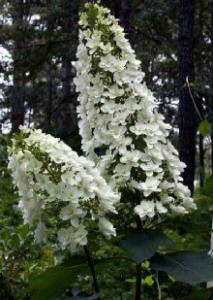
The blooms of Oakleaf Hydrangea – Hydrangea quercifolia ‘Snowflake’

shaped flower heads that start out white, but turn beautiful shades of pink and red as the season progresses.In the fall, the foliage puts on a great show and in winter, the exfoliating bark adds interest until spring. If you want to learn more about Oakleaf Hydrangeas, click here or just read on.

Finally, if you want to add some serious drama to your garden, the climbing Hydrangea may be just what you need.This large vine can grow over 40 ft. and produce hundreds of large flowers heads.It can climb up tree trunks or onto sturdy structures.In warm climates, it needs some shade, but typically still flowers well in shady spots.

Now that you understand the different types of Hydrangeas, you can explore each type in more depth.Just click below to go to the next parts of our series on this great garden shrub.Learn how to grow and care for Hydrangeas in your garden and select the best cultivars to give you the garden performance you’re looking for.

Part 2 – Bigleaf Hydrangeas (Hydrangea macrophylla)

Part 3 – Pee Gee Hydrangeas (Hydrangea paniculata)

Part 4 – Smooth Hydrangeas (Hydrangea aborescens)

Part 5 – Oakleaf Hydrangeas (Hydrangea quercifolia)

Part 6 – Climbing Hydrangeas (Hydrangea anomala petiolaris)


Posted in Gardening, Shrubs | Tagged , , , , , , , , , , , , , | Leave a comment

Perennial Geraniums – Front of the Border Heroes

One of our favorites in the mixed border, these fragrant and versatile beauties willliven up any perennial garden.

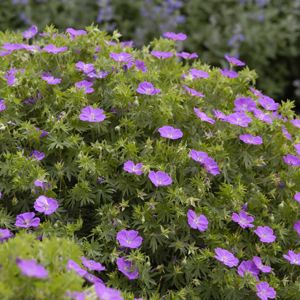
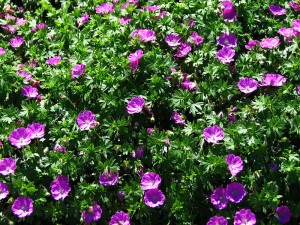
Geranium sanguineum “New Hampshire Purple” forms a mound of lush foliage and flowers

Geraniums are frequently used by garden designers, but have somehow been overlooked by most homeowners planting their own gardens.  Their dense mounds of lush foliage start early and last long after other foliage has faded. White, pink or purple flowers bloom abundantly in May and June.  Some varieties even bloom into October!  Foliage is evergreen in some species giving them year-round interest.   With a wide range of species and cultivars, there is a geranium that will thrive in almost any northern garden.

Will the real Geranium Please Stand Up?

When most of us hear the word “geranium”, we think of the bright red flowers of the annual “geraniums” we saw as potted plants at our grandmother’s house.

These annual plants are actually pelargonium, not true geraniums

This ubiquitous house plant is actually a pelargonium, a cousin of the true perennial geraniums we’ll introduce you to here.Perennial geraniums (actual members of the genus Geranium) are quite different plants.  We’re going to introduce you to a group of lovely, versatile, and fragrant garden perennials that are a must-have for any mixed border garden.

Geraniums in the Garden

The genus Geranium includes over 400 species (sometimes called “Cranesbill”) and endless cultivated varieties.We’ll introduce you to the few cultivars that will really perform in your garden.Most geraniums are low growing, mounding plants that are at home in the front of the border.Some are semi-evergreen and most have foliage that has a unique spicy scent.Flowers range from white to pinks and purples.

Geranium sanguineum “Max Frei”

So, why do we love geraniums so much?Here’s a short list of what makes them so valuable:1) Fragrant foliage that looks good all season long, 2) Blooms that are numerous, long lasting and reliable, 3) They grow vigorously in a wide variety of conditions and 4) Deer don’t like them!This is a list not many perennials can duplicate.Geraniums even look great in mass plantings or by themselves mixed with complimenting perennials.

While these little beauties are easy to care for and almost fool proof in the garden, there are a few things to watch out for.Geraniums have been so cultivated in recent years, there are some underachieving cultivars on the market.It seems the market has drifted towards creating more interesting flowers and has sacrificed habit and foliage along the way.The major problem with some of the “popular” cultivars is that they tend to either get too tall, and collapse or, they develop a lanky creeping habit that needs frequent trimming.We’ll guide you to the tried and true varieties that really work starting with some of our very favorites.

Our favorite Geraniums

Geranium sanguineum “New HampshirePurple” – This is an old standard among the perennial geraniums. It’s become a little hard to find these days due to the onslaught of new cultivars flooding the market, but it’s worth the effort to find it.

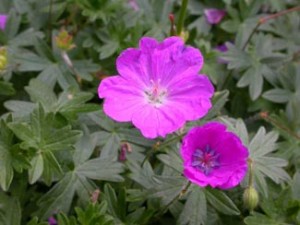
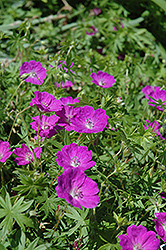
Flowers of Geranium sanguineum “New Hampshire Purple”

“New Hampshire Purple” is one of our all-time favorite perennials.This geranium quickly creates mounds of deep cut foliage 12-18 inches high and is covered in magenta flowers from late May to late June.  It even flowers sporadically after that, until frost.’New Hampshire Purple” prefers sun, but it can also take some shade.It will clump generously, so it is very easy to divide and spread around the garden (but don’t worry, it’s never invasive).New clumps grow quickly into flowering mounds.The only drawback to “New Hampshire Purple” is that it sometimes gets a little too tall and will collapse a bit in a good rain.If this happens, don’t worry, you can just wait a few days for it to recover or you can give it a trim and within a week it will be flushing out new growth.

Geranium sanguineum “Max Frei” – This is more or less a compact version of “New Hampshire Purple”.   It prefers sun and

Geranium sanguineum “Max Frei”

produces virtually the same magenta flowers, but it grows much more slowly and stays a compact 6-12 inches.This means that you never have to worry about it collapsing in the rain, but you will also need to be more patient if you want to divide it and spread it around the garden.If filling in large areas is your goal, then stick with “New Hampshire Purple”.If you want a more tidy, compact plant that never looks messy, then go with “Max Frei”.

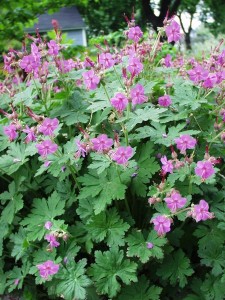
Geranium macrorrhizum “Bevan’s Variety” – This geranium prefers some shade but can tolerate some sun and even dense shade.“Bevan’s Variety” is typically considered a ground cover,

Geranium macrorrhizum “Bevans Variety”

but it can stand on its own as a perennial in a mixed border.It also looks great in mass plantings in the shade.It has a compact habit of lush, semi-evergreen foliage that has a strong spicy fragrance.Rose pink flowers are borne on stems that rise slightly above the mounding foliage for an elegant effect.Bloom time is late May to early June.The bloom period is much shorter than the Geranium sanguineum varieties, but the beautiful foliage more than makes up for its short bloom time.You never have to worry about “Bevan’s Variety” looking messy or unkempt.It always looks tidy and lush, even after the first few frosts. It also divides very easily and grows quickly. For shady spots, this is the geranium we suggest.

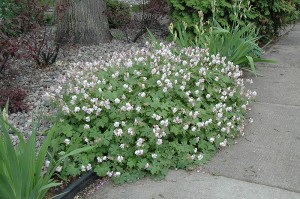
Geranium X cantabrigiense “Biokovo” and “Karmina” – These geraniums are similar to Geranium macrorrhizum “Bevan’s Variety”, but the foliage is smaller and

Geranium X cantabrigiense “Biokovo”

tighter, forming very dense, fragrant green mounds of about 6 to 8 inches. “Biokovo” has white flowers, while “Karmina” has rose pink flowers.Otherwise, they are virtually identical. Bloom time is long, from late May to late June. “Biokovo” and “Karmina” can grow in both full sun and part shade and perform equally well.Like most geraniums, they divide very easily and grow quickly.They look great on rock walls or in mass plantings.

Geranium X cantabrigiense “Karmina”

Note : We have found the cultivar Geranium X cantabrigiense “St. Ola” to be virtually identical to “Biokovo”, so you can use them interchangeably.

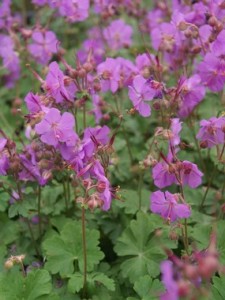
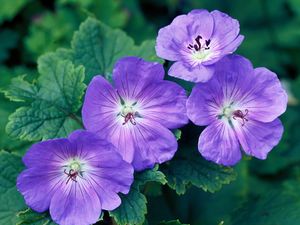
Geranium X “Rozanne” – This is geranium is undoubtedly the most popular in recent years.Its fame is due to its unusually long and prolific bloom period.“Rozanne” produces a profusion of purple flowers with white centers from late May to mid October.It’s truly a marvel among its peers.However, it does have a few serious drawbacks.It grows extremely fast and can become long and leggy almost approaching the behavior of a vine.It’s also rumored to have a relatively short life of just a few years.It does best in full sun, but flowers almost anywhere.If you want lots and lots of flowers, then “Rozanne” may be for you.Just be prepared to either enjoy the messy, leggy habit or trim it regularly to keep it in check.

Geranium “Rozanne” blooms from May to October

You will find many, many more varieties of perennial geraniums on the market, but these few will fill almost any garden need and will be reliable and relatively easy to find.Many newer varieties will have more interesting flowers, but may not be as vigorous.Try geraniums in mass plantings, or on the edges of stone walls.They look great almost anywhere.And, more importantly, they look great all season long.Not many perennials bloom in May and still look good for the rest of the season.They are a must for every garden with deer problems.Geraniums are among the few perennials I have never seen a deer eat!

So, go ahead and try out one (or more!) of these geranium varieties in your garden.You won’t be disappointed!

Posted in Gardening, Perennials | Tagged , , , , , , , , , | Leave a comment

A Guide to Growing Iris Blooms All Season

For those of us that love irises, their blooms seem to come and go much too quickly in the average garden.  Most irises bloom for a week or two and then fade into the background of the garden for the rest of the season.

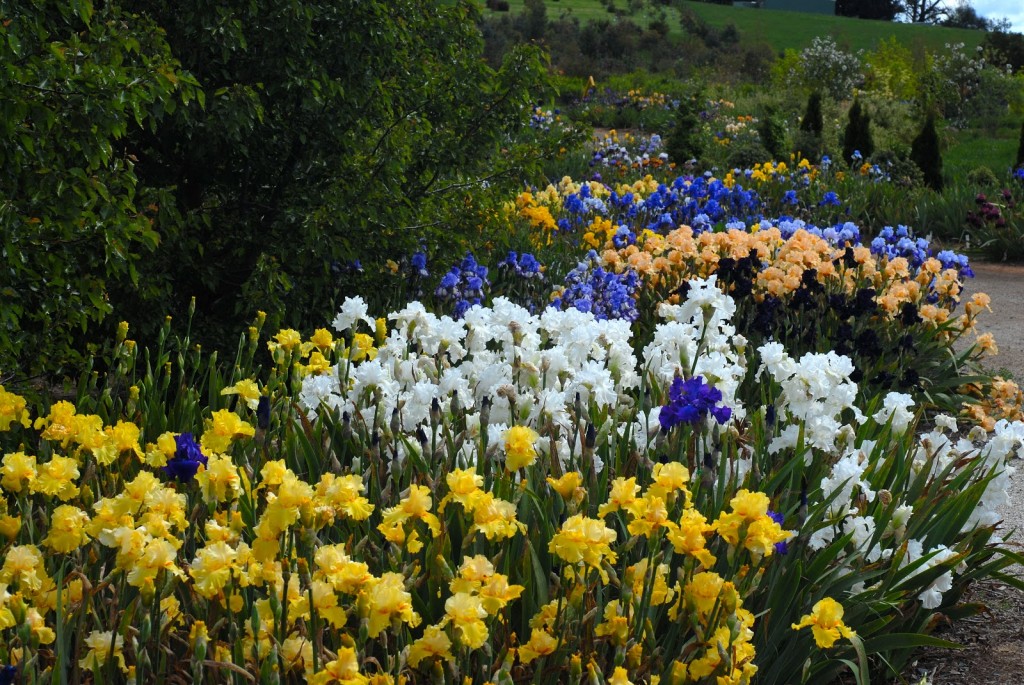
Irises in garden of Graeme Grosvernor, courtesy of the American Iris Society

This would be the end of the story for the iris if there were only one species of iris to grow.  Lucky for us, there are actually several different species and cultivars of iris that bloom at different times throughout the season.    Using a mix of different species and cultivars, you can have iris blooming virtually all season long in your garden.

The Misunderstood Iris

Homeowners and landscapers that are not experienced gardeners usually don’t realize the wide variety of irises that are available to them.  Most of us can only identify the common bearded iris (iris germanica) with its broad sword-like leaves and its traditional floppy purple blooms. In this post, we’ll introduce you to a handful of other iris species and let you know how to plant them so that you can enjoy them from April until September. All of them are easily available from most well stocked nurseries (or over the internet), and all of them are relatively easy to grow.  So, let’s get to know some of them…

Early Blooming Irises

Iris reticulata (Iris reticulata) is the earliest blooming of the irises we’ll discuss here.  It is a bulb and therefore must be planted in the fall.

Iris reticulata in bloom

Iris reticulata is a low growing colorful iris that blooms brightly in late March in the Northeast.  Its flowers are borne on short stems only about 6 inches high or less and the foliage is very thin and grass like.  The blooms usually last into mid-April and then the plant virtually disappears.  Unlike most bulbs, it doesn’t go through an ugly phase after blooming.  The flowers come in several different colors, but it is most easily found in shades of purple.  Since the flower is so small, you will want to plant several (think groups of 50-100 bulbs) to make a statement.   Plant this iris in a sunny spot where it will be easily visible. They only need to be planted a few inches deep, so they’re easier than most bulbs.  The only drawback to Iris reticulata is that it sometimes peters out after a season or two, so you may have to add additional bulbs to your planting in subsequent years.

Don’t bother looking for this iris in  the nursery.  Since it is a bulb , it is easiest to buy via mail order or over the internet  during the spring or the summer. Buy it in large quantities.  Each bulb will only produce one small bloom.

Dwarf Bearded Iris (Iris pumila).  This iris looks like an exact miniature of the more common, tall bearded iris (Iris germanica).  The flowers are big and showy, and come in all colors of the rainbow.

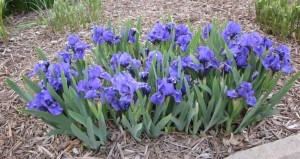
Iris pumila “Manhattan Blues”at Highland Park, Pittsburgh

The foliage is wide and sword-like, and even better looking than its taller cousin.  The entire plant is roughly 10-12 inches tall and very compact.  Blooms appear in early May and usually last for two weeks.  Iris pumila likes well drained soil in a sunny location.  Most larger nurseries will carry Iris pumila in containers, but it may be harder to find than other irises.  The major drawback of this dwarf beauty is that it experiences a very ugly phase after blooming.  Cut flower stalks to the ground, and foliage to about three inches high, after blooming is done or whenever the plant starts to look unsightly.  This will help keep a tidy look, and foliage will regrow within a few weeks.

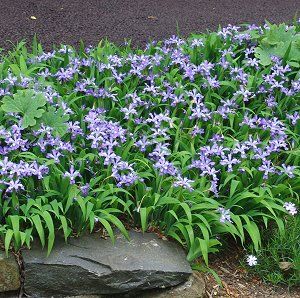
Crested Iris (Iris cristata) This iris is so small, it is usually considered a ground cover.  The flowers, however, are showy and plentiful, so it makes an impression even if it only gets four-six inches tall. Unlike most garden irises, this one likes the shade and will spread vigorously, creating a mat of lovely, wide, grassy foliage and beautiful blooms.

Crested iris (Iris cristata)

The crested iris blooms mid to late May , so it might be in bloom at the same time as Iris pumila depending on where you are located.  Don’t let this stop you from planting it.  Since it loves shady spots, it can occupy a part of your garden that Iris pumila (and most other irises) won’t tolerate.   Bloom color ranges from white through the blues and purples.  The foliage also stays great-looking even after the bloom is finished, so there is virtually no maintenance required.  The only drawback to the crested iris is the short bloom time (only about a week), but its graceful foliage keeps this plant looking great all season long.

Mid-Season Irises

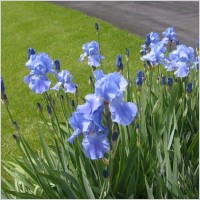
Tall Bearded Iris (Iris germanica) This is the most common iris in the gardens of the northeast.  Its large, showy flowers are familiar to most of us.  This type of iris has been cultivated extensively, so there are literally hundreds of varieties available.  Tall bearded irises have wide leaves that can appear almost blue-green.  They bloom just after Iris pumila in mid to late May and can last two-three weeks.

Tall Bearded Iris (Iris germanica)

Tall bearded iris is easy to grow, as long as  it is planted in well drained soil and gets full sun.  This plant will not tolerate wet feet.  Depending on the variety, heights of flower stalks usually vary between two and three feet.  The flowers bloom above the foliage, so the plant is somewhat shorter when not in bloom.  Flowers are available in all colors of the rainbow and newer varieties will even rebloom in late summer or fall.  There are two major drawbacks of the tall bearded iris.  One is that the flower stalks sometimes need staking.  This varies widely depending on conditions and the variety.  The other drawback is that, like its cousin, Iris pumila, it will get very unsightly looking after blooming.  Cut back foliage to about six inches after bloom.

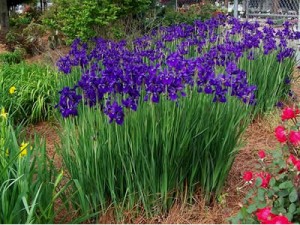
Siberian Iris (Iris sibirica) The Siberian iris is a truly graceful plant.  It is easier to grow than bearded irises and it maintains lovely foliage throughout the season.  It has a tall, slender habit with long green grass-like leaves.  Flowers appear slightly later than bearded iris, but the two varieties will overlap for most of their bloom.

Siberian iris (Iris sibirica)

Blooms are available in many colors, but the most common varieties are variations of purple or white.  Foliage is typically between two and four feet tall with flowers blooming slightly above the foliage.  Siberian iris needs more moisture than the bearded varieties, but it is very versatile.  It can take both full sun and part shade.  It really has no significant drawbacks.  Its bloom period is a little shorter than the bearded irises and the flowers are less showy, but the overall effect is very graceful and elegant.  Most importantly, the foliage looks great even after blooming is done.

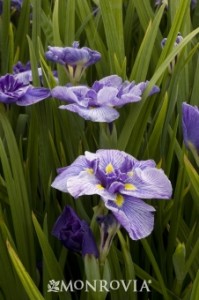
Japanese Iris (Iris ensata) Japanese iris is by far the most elegant of all the irises.

Japanese iris (Iris ensata) courtesy of Monrovia

The habit is very similar to the Siberian iris, but the flowers are larger and much more showy.  Japanese irises bloom after Siberian irises are past, from late June through mid July.  The flowers can be absolutely breathtaking.  The flower heads are almost flat and very large, on tall delicate stems.  Japanese irises can be a little finicky and need a lot of moisture to thrive, especially up until the time they bloom.  It may be for this reason that they are so underutilized in northeast gardens.  Japanese irises prefer a moist location in full sun and can even live with their roots submerged in water.  If you do not have a moist area in your garden, create a depression in the garden and use plenty of peat during planting.  This is their only drawback, otherwise the plant is very low maintenance and the foliage stays looking great all season long.

Late-Season Irises

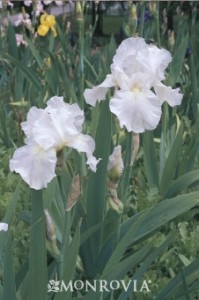
Reblooming Bearded Irises.  Various tall bearded iris cultivars  are now available that rebloom in the late season garden.  These repeat bloomers have different types of reblooming patterns and may behave differently in different climates.

Reblooming iris “Immortality” courtesy of Monrovia

However, there is one cultivar that is both a reliable rebloomer and easy to find at your local nursery.  “Immortality” is a tall bearded iris with white flowers that blooms along with other tall bearded irises, then reliably reblooms in late season (usually August or September).  The late season bloom will not produce as many flowers, but it is still a welcome sight in August or September.  “Immortality” looks and behaves just like any other tall bearded iris, so follow the same planting guidelines.

Planting Your Iris Garden

Now you know the right irises to buy, so you can get started planting.  These irises can be planted anytime you buy them with the exception of iris reticulata, which can only be planted in the fall (anytime before the ground freezes).  Just a few things to remember…. The bearded irises need lots of sun, so place them accordingly.  The Japanese iris needs lots of water, so water it regularly or plant it in a depression that can collect water naturally.  The crested iris likes shade, so give it a nice shady spot close to the edge of your garden where its small size won’t be an issue.

Once again, here is the final line-up for iris blooms all season long:

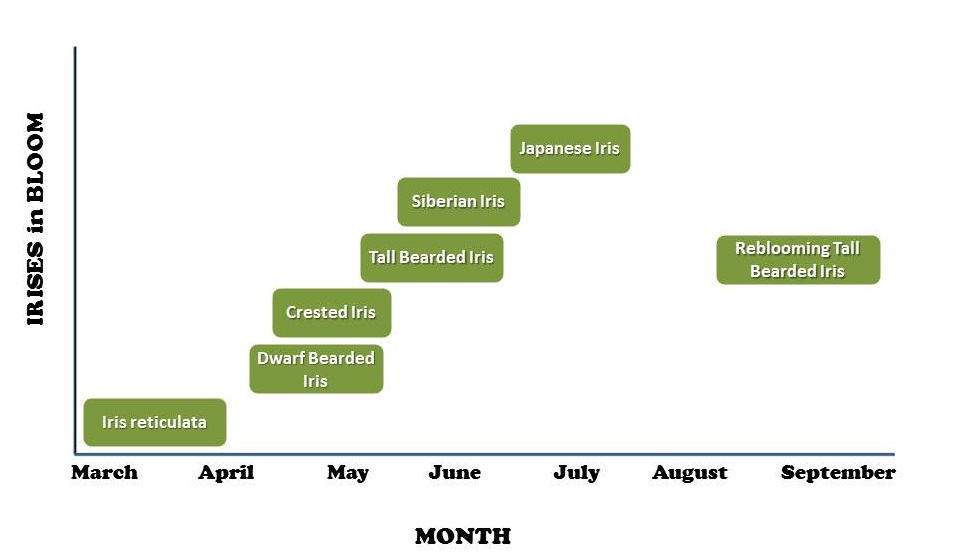
Iris Reticulata (Iris reticulata – any variety), Dwarf Bearded Iris (Iris pumila – any variety), Crested Iris (Iris cristata – any variety), Tall Bearded Iris (Iris germanica – any variety), Siberian Iris (Iris sibirica – any variety), Japanese Iris (Iris ensata – any variety), Reblooming Iris (Iris x germanica cultivar “Immortality” suggested).

This bloom calendar should help you plan your garden:

Bloom times for iris varieties

Enjoy your beautiful iris blooms and don’t forget to buy your Iris reticulata bulbs in the spring or summer so you can plant them in the fall!

Posted in Gardening, Perennials | Tagged , , , , , , , , , , , , , , , | 1 Comment